Unityでドット絵シェーダ その3

このコンテンツは、『ユニティちゃんライセンス』で提供されています
前回のドット絵シェーダはスクリプトからドット粒度を変えられるようになりましたが、
ドットの粒度が画面全体ですべて同じになってしまうという特徴(欠点)がありました。
これではカメラが近づいた時はドットが細かくなりすぎ、逆に離れた時には粗くなりすぎます。
ということで深度に応じてドット粒度を変更できるようにしてみました。
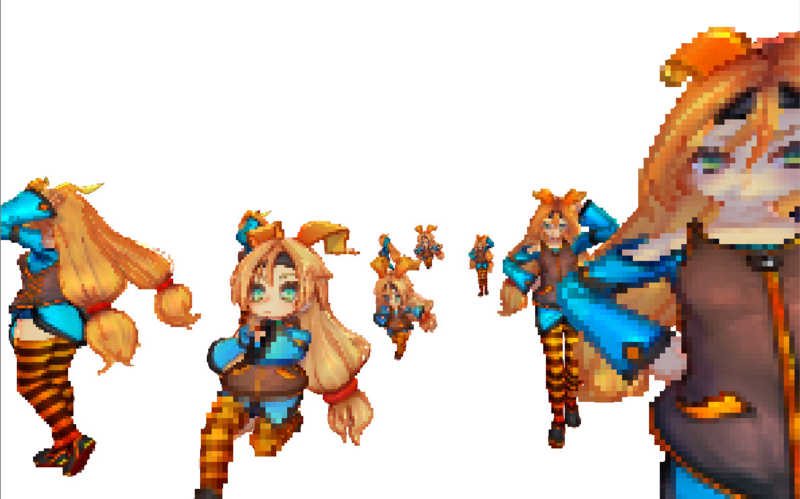
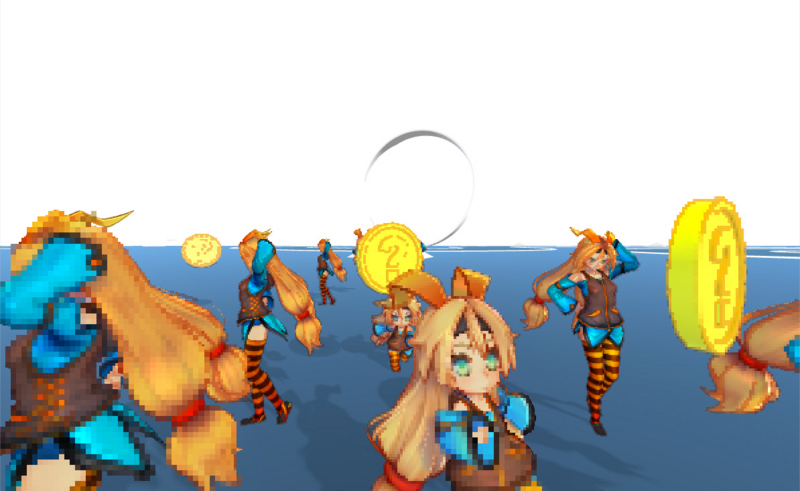
前回の時点で、2x2、4x4、8x8…のドット絵がそれぞれ生成出来ているので、それを深度値でスライスして合成しています。(近いほど粗いドット絵が使用されるように)
これでどこにカメラを動かしても、キャラが離れてドットが潰れてしまうことがなくなります。
またバグ修正(イメージエフェクトの使用状況によって深度テクスチャのUVが反転する)も行いました。
DotImageEffect.cs(Cameraに追加するイメージエフェクトコンポーネントのスクリプト)
using UnityEngine;
using System.Collections;
using System.Collections.Generic;
using UnityStandardAssets.ImageEffects;

[ExecuteInEditMode]
[RequireComponent(typeof(Camera))]
[AddComponentMenu("Image Effects/DotImgeEffect")]
public class DotImageEffect : ImageEffectBase
{
    [Range(1, 10)]
    public int Downsample = 3;  // 解像度を落とす回数+1。1回ごとに解像度を半分に落とす。

    [Range(0.001f, 0.1f)]
    public float ValidDepthThreshold = 0.01f;  // 深度が近いドットを平均化するときの閾値

    [Range(0, 5f)]
    public float EdgeLuminanceThreshold = 0.8f; // エッジ部と判定するための輝度差。この値以上離れていたらエッジとみなす。

    [Range(0, 1f)]
    public float SharpEdge = 0.5f;  // 平均化する際のコントラスト強調パラメータ

    [Range(-5,5f)]
    public float SampleDistance =1f;  // テクスチャサンプリング距離

    public List<float> SliceDepth;


    void OnEnable()
    {
        // 深度の取得を有効にする
        GetComponent<Camera>().depthTextureMode |= DepthTextureMode.DepthNormals;
    }

    [ImageEffectOpaque]
    void OnRenderImage(RenderTexture source, RenderTexture destination)
    {
        material.SetFloat("_ValidDepthThreshold", ValidDepthThreshold);
        material.SetFloat("_EdgeLuminanceThreshold", EdgeLuminanceThreshold);
        material.SetFloat("_SharpEdge", SharpEdge);

        var RT = new RenderTexture[Downsample];
        for (int i = 0; i < Downsample; i++)
        {
            RT[i] = RenderTexture.GetTemporary(Screen.width / (int)Mathf.Pow(2, i), Screen.height / (int)Mathf.Pow(2, i), 0, RenderTextureFormat.ARGBHalf);
            RT[i].filterMode = FilterMode.Point;
        }
        // RT0のAチャンネルに、深度*(1-α)を格納する。
        // 深度*(1-α)は優先度として作用する。
        Graphics.Blit(source, RT[0], material, 0);

        // 1回毎に解像度を半分に落としドット化する
        for (int i = 1; i < Downsample; i++)
        {
            material.SetVector("_PixelSize", new Vector4(1.0f / RT[i-1].width, 1.0f / RT[i-1].height, 0, 0) * SampleDistance);

            // ドット絵変換
            Graphics.Blit(RT[i-1], RT[i], material, 3);
        }

        if (SliceDepth.Count == 0 || SliceDepth.Count != Downsample)
        {
            // すべて同じドット粒度
            Graphics.Blit(RT[Downsample-1], destination);
        }
        else
        {
            SliceDepth[0] = 1.01f;

            var RTD = new RenderTexture[Downsample];
            for (int i = 0; i < Downsample; i++)
            {
                RTD[i] = RenderTexture.GetTemporary(RT[i].width, RT[i].height, 0, RenderTextureFormat.RHalf);
                RTD[i].filterMode = FilterMode.Point;
            }


            for (int i = 0; i < Downsample; i++)
            {
                if (i == 0)
                {
                    var FullDepth = RenderTexture.GetTemporary(Screen.width, Screen.height, 0, RenderTextureFormat.RHalf);
                    Graphics.Blit(source, FullDepth, material, 1);
                    material.SetVector("_PixelSize", new Vector4(1.0f / Screen.width, 1.0f / Screen.height, 0, 0));
                    Graphics.Blit(FullDepth, RTD[0], material, 2);
                    RenderTexture.ReleaseTemporary(FullDepth);
                }
                else
                {
                    material.SetVector("_PixelSize", new Vector4(1.0f / RTD[i - 1].width, 1.0f / RTD[i - 1].height, 0, 0));
                    Graphics.Blit(RTD[i - 1], RTD[i], material, 2);
                }
            }

            for(int i = Downsample-1;i >= 1;i--)
            {
                material.SetFloat("_SliceDepth", SliceDepth[i]);
                material.SetTexture("_MinDepth", RTD[Downsample-1]);
                Graphics.Blit(RT[i], RT[i-1], material, 4);
            }
            Graphics.Blit(RT[0], destination);


            for(int i = 0;i < Downsample;i++)
            {
                RenderTexture.ReleaseTemporary(RTD[i]);
            }
        }

        for(int i = 0;i < Downsample;i++)
        {
            RenderTexture.ReleaseTemporary(RT[i]);
        }
    }

}
DotImageEffectShader.shader(上記スクリプトのShaderに入れるシェーダ)
Shader "Hidden/DotImageEffectShader" {
	Properties{
		_MainTex("", 2D) = "" {}
	}
		SubShader{

		ZTest Always
		ZWrite Off
		Cull Off
		Fog{ Mode Off }

		CGINCLUDE
		#include "UnityCG.cginc"
		#pragma target 3.0
		struct v2f
		{
			float4 pos : SV_POSITION;
			float2 uv : TEXCOORD0;
			float2 uv2 : TEXCOORD1;
		};

		sampler2D _MainTex;
		float4 _MainTex_ST;
		float4 _MainTex_TexelSize;
		sampler2D _CameraDepthNormalsTexture;
		float4 _CameraDepthNormalsTexture_ST;

		v2f vert(appdata_img v)
		{
			v2f o;
			o.pos = mul(UNITY_MATRIX_MVP, v.vertex);
			o.uv = TRANSFORM_TEX(v.texcoord, _MainTex);
			o.uv2 = TRANSFORM_TEX(v.texcoord, _CameraDepthNormalsTexture);

			if (_MainTex_TexelSize.y < 0)
				o.uv2.y = 1.0 - o.uv2.y;

			return o;

		}


		float GetDepth(half2 uv)
		{
			float4 depthnormal = tex2D(_CameraDepthNormalsTexture, uv);
			float3 viewNorm;
			float depth;
			DecodeDepthNormal(depthnormal, depth, viewNorm);
			return depth;
		}
		#pragma vertex vert
		ENDCG

		// Pass0 RGB+D(Depth*(1-a))
		Pass{

			CGPROGRAM
			#pragma fragment frag

			half4 frag(v2f i) : SV_Target
			{
				half4 centerCol = tex2D(_MainTex, i.uv);
				centerCol.a = (1 - centerCol.a) * GetDepth(i.uv2);
				return centerCol;
			}
				ENDCG
		} // Pass0


		// Pass1 DepthOnly
		Pass{

				CGPROGRAM
				#pragma fragment frag

				half4 frag(v2f i) : SV_Target
				{
					return GetDepth(i.uv2);
				}
					ENDCG
		} // Pass1

		// Pass2 MinDepth
		Pass{

			CGPROGRAM
			#pragma fragment frag

			uniform float4 _PixelSize;
			half4 frag(v2f i) : SV_Target
			{
				float minDepth = 9999;
				i.uv -= 0.5 * _PixelSize.xy;

				for (int x = 0; x < 2; x++)
				{
					for (int y = 0; y < 2; y++)
					{
						float2 uv2 = i.uv + _PixelSize.xy * float2(x, y);
						minDepth = min(minDepth, tex2D(_MainTex,uv2).r);
					}
				}
				return minDepth;
			}
				ENDCG
		} // Pass2


		// Pass3 DotEffect
		Pass{

			CGPROGRAM
			#pragma fragment frag


			uniform float4 _PixelSize;
			uniform float _ValidDepthThreshold;
			uniform float _EdgeLuminanceThreshold;
			uniform float _SharpEdge;

			half4 frag(v2f i) : SV_Target
			{
				half4 centerCol = tex2D(_MainTex, i.uv);
				half4 nearCol;
				float4 cols[4];

				i.uv -= 0.5 * _PixelSize.xy;

				// minDepth Detection
				float minDepth = 9999;

				for (int x = 0; x < 2; x++)
				{
					for (int y = 0; y < 2; y++)
					{
						float2 uv2 = i.uv + _PixelSize.xy * float2(x, y);
						float4 c = tex2D(_MainTex, uv2);
						cols[y * 2 + x] = c;

						if (minDepth > c.a)
						{
							minDepth = c.a;
							nearCol = c;
						}
					}
				}

				float4 col = 0;
				float weights = 0;
				float minLum = 9999;
				float maxLum = 0;

				for (int j = 0; j < 4; j++)
				{
					half depth = cols[j].a;

					// 有効ピクセルのみ処理する
					if (abs(depth - minDepth) < _ValidDepthThreshold)
					{
						float Lum = Luminance(cols[j].rgb);
						float weight = pow(Lum - 0.5, 2) * 4;	// 白と黒を強調する
						weight = lerp(1, weight, _SharpEdge);

						col += cols[j] * weight;
						weights += weight;

						minLum = min(minLum, Lum);
						maxLum = max(maxLum, Lum);
					}
				}
				col /= weights;


				// 輝度差が大きい場合は平均化を行わない
				if (maxLum - minLum > _EdgeLuminanceThreshold)
				{
					col = nearCol;
				}

				return col;
			}
				ENDCG
		} // pass3


		// Pass4 SliceComposit
		Pass{

		CGPROGRAM
		#pragma fragment frag

			uniform float _SliceDepth;

			sampler2D _MinDepth;

			half4 frag(v2f i) : SV_Target
			{
				half4 c = tex2D(_MainTex, i.uv);
				float depth = tex2D(_MinDepth,i.uv).r;
				clip(_SliceDepth - depth);

				return c;
			}
				ENDCG
		} // pass4

	}
}
使い方は、SliceDepthに深度(0-1)のスライス値を1つずつ設定していきます。
ソースを見ればわかりますが、Downsampleと同じ個数設定してないと、これまで通り最も粗いドット絵が使用されます。
またSliceDepthの0番目はプログラムによって1.01(深度の最大値)で上書きされ、一度は必ず描画されるようにしてあります。
シェーダの修正ポイントは、深度だけ出力するパス、ダウンサンプル時にmin深度を出力するパス、スライス合成のパスの追加と、パスが増えたのでCGINCLUDE~ENDCGの中に共通するコードをまとめました。
使用例
前回は正投影でしたが、距離感が必要なので今回は透視投影です。
単一のドット絵(16x16)

複数段階合成のドット絵(2x2~16x16)

キャラクター以外との合成

概ねいい感じですが、Unityちゃんの標準シェーダは髪の裏側は深度を出力していないようで、そこらへん少しおかしく見えます。Unity5用になっていないからでしょうか。
しかしこうしてみるとドット絵というか被写界深度のドット版って感じですね。
【追記 2015/06/06】
DotImageEffect.csを下記のように修正しました。
・SliceCompositを各段階のレンダーテクスチャに行うことで最適化。
・SlideCompositが参考にする深度値のブロックを、最も粗いものを使うようにした。
これにより深度境界におけるブロックの粒度が一定になります。
・Android(Nexus5)での動作確認