HTC ViveでペンタVR上でクリスタが使えるように改良する その2(解像度問題の解決策を模索する編)
はじめに
前回あまりにも適当だったので、今回はシェーダーも絡めてペンタVRをさらに実用的なものにします。
ミップマップを有効にする
前回の仕組みでは、テクスチャデータを直接更新しているためにミップマップが有効になっておらず、テクスチャのジャギーが目立っていました。今回は、いったんキャプチャしたテクスチャをミップマップの自動生成が有効なレンダーターゲットに書き込むことでミップマップを有効にしています。ジャギーが消えるのでかなり落ち着いて見えます。
凹みさんの
DesktopCapture.csをさらに改造します
using UnityEngine;
using System;
using System.Collections;
using System.Runtime.InteropServices;

public class DesktopCapture : MonoBehaviour
{
    [DllImport ("DesktopCapture")]
    private static extern void Initialize();
    [DllImport ("DesktopCapture")]
    private static extern int GetWidth();
    [DllImport ("DesktopCapture")]
    private static extern int GetHeight();
    [DllImport ("DesktopCapture")]
    private static extern bool IsPointerVisible();
    [DllImport ("DesktopCapture")]
    private static extern int GetPointerX();
    [DllImport ("DesktopCapture")]
    private static extern int GetPointerY();
    [DllImport ("DesktopCapture")]
    private static extern int SetTexturePtr(IntPtr ptr);
    [DllImport ("DesktopCapture")]
    private static extern IntPtr GetRenderEventFunc();

    public bool isPointerVisible = false;
    public int pointerX = 0;
    public int pointerY = 0;

    public RenderTexture rt;
    public Texture2D tex;

    public bool updateScreenCapture;
    void Start()
    {
        tex = new Texture2D(GetWidth(), GetHeight(), TextureFormat.BGRA32, false);

        SetTexturePtr(tex.GetNativeTexturePtr());
        StartCoroutine(OnRender());

        // 描画用レンダーターゲット作成
        rt = new RenderTexture(2048, 2048, 0);
        rt.generateMips = true;
        rt.useMipMap = true;
        rt.anisoLevel = 8;
        rt.Create();
        GetComponent<Renderer>().sharedMaterial.mainTexture = rt;
    }

    void Update()
    {
        isPointerVisible = IsPointerVisible();
        pointerX = GetPointerX();
        pointerY = GetPointerY();

        if (Time.frameCount % 3 == 0)
            updateScreenCapture = true;
        else
        {
            // 更新していない時にコピー
            Graphics.Blit(tex, rt);
        }
    }

    IEnumerator OnRender()
    {
        for (;;)
        {
            yield return new WaitForEndOfFrame();
            if (updateScreenCapture)
            {
                GL.IssuePluginEvent(GetRenderEventFunc(), 0);
                updateScreenCapture = false;
            }
        }
    }
}
拡大鏡を作る
ペンタブの有効範囲と同サイズの仮想ディスプレイでは、UIなどの文字が見えなくなるくらい解像度が低くなることについて、前回問題点としてあげました。感覚的には近眼の人が裸眼で見ているのに近い状態になります。
では現実世界のように、拡大鏡を作ってあげましょう。様々なパターンを試作しました。
素直な拡大鏡
まずマウス位置をUV座標としてスクリーンのシェーダーに送り、拡大させました。
絵を描いているときは拡大鏡が邪魔
さて、ここで問題が発生します。ペンタVRはお絵描き用のため、絵を描いている最中は拡大鏡を使いたくありません。メニューなどのUIを操作している時だけ拡大して欲しいのです。(アプリ側が対応すればできそうですが、そうなると汎用性がなくなるので却下です)
具体的には、拡大鏡がONになるタイミングとOFFになるタイミングを明確にコントロールしたい(ただしボタンを押すなどは避けたい)ということです。
視点位置の利用
マウスで操作する前に必ずそこを"見る"のだから、アイトラッキングのように視点位置を使ってその場所を拡大すればいいのでは?と考えました。
実際やってみたのですが、頭の動きはあまり安定していないのに加え、マウスの見た目上の移動速度が変わってしまうため、この方法は却下されました。
色々
邪魔にならないようシャペロンみたいにエッジ検出を行ってエッジ部のみ表示するとか、マウスが動いていたら拡大鏡を消して止まったら出すとか、いろいろ試しましたが、いずれもウザったかったです。
結果
最終的に以下の方法に落ち着きました。
視点位置とマウス位置が近い場合拡大鏡を表示する。視点位置がズレれば拡大鏡は消える。
この方法なら拡大鏡の有無を感覚的に操作できることが分かりました。慣れれば無意識的に行えるようになるはずです。

 メニューを拡大しているところ
 カラーサークルを拡大しているところ
ズームするスクリーンのシェーダ
ZoomScreen.shader
Shader "ZoomScreen" {
	Properties{
	}
	SubShader{
		Tags { "RenderType" = "Opaque" }
		LOD 200

		CGPROGRAM
		// Physically based Standard lighting model, and enable shadows on all light types
		#pragma surface surf Standard fullforwardshadows

		// Use shader model 3.0 target, to get nicer looking lighting
		#pragma target 3.0

		sampler2D _MainTex;

		struct Input {
			float2 uv_MainTex;
			float3 worldPos;
			float3 worldNormal;
		};

		half _Glossiness;
		half _Metallic;
		fixed4 _Color;

		fixed2 _MousePos;
		fixed2 _EyePos;
		fixed _ZoomRadius;
		half _Aspect;
		fixed _Zoom;
		fixed _Intensity;

		void surf (Input IN, inout SurfaceOutputStandard o)
		{

			// ズーム前のスクリーン色
			fixed4 c = tex2D(_MainTex, IN.uv_MainTex);

			// スクリーンとカメラとの距離を求め、拡大率と拡大鏡のサイズを変更する
			float cameraDist = dot(IN.worldNormal, _WorldSpaceCameraPos - IN.worldPos);
			_ZoomRadius = min(0.3, cameraDist * _ZoomRadius);
			_Zoom = min(0.9, cameraDist * _Zoom);

			// マウス位置とUVの差から、マウス位置からの距離(UV座標上)を求める
			half2 uvDiff = IN.uv_MainTex - _MousePos.xy;
			uvDiff.y /= _Aspect;	// アスペクト比を考慮する
			half uvDist = length(uvDiff);

			if (uvDist < _ZoomRadius)
			{
				// ズームするUVを計算
				IN.uv_MainTex -= (IN.uv_MainTex - _MousePos.xy) * _Zoom;

				// マウスの位置と視点位置が遠いと、透明になる
				fixed Opacity = saturate(1 - length(_MousePos - _EyePos) * 4);
				// 周辺とブレンドさせる
				fixed Blend = 1 - pow(uvDist / _ZoomRadius, 4);
				c = lerp(c, tex2D(_MainTex, IN.uv_MainTex),Blend * Opacity);
			}

			// マウスポインタを反転で表現
			if (uvDist < 0.002f)
			{
				c = 1 - c;
			}

			// 視点位置ポインタを反転で表現
			uvDiff = IN.uv_MainTex - _EyePos;
			uvDiff.y /= _Aspect;
			uvDist = length(uvDiff);

			if (uvDist < 0.002f)
			{
				c = 1 - c;
			}

			// 結果
			o.Albedo = 0;
			o.Emission = c.rgb * 0.5;
			o.Metallic = 0;
			o.Smoothness = 0;
			o.Alpha = c.a;
		}
		ENDCG
	}
	FallBack "Diffuse"
}
ズームスクリーンにパラメータ(マウス位置、視点位置など)を渡す
DrawPointer.cs
using UnityEngine;
using System.Collections;

public class DrawPointer : MonoBehaviour
{
    public Transform Head;
    public float ZoomRadius = 0.1f;
    public float Zoom = 0.7f;

    public DesktopCapture capture;
    public int ScreenWidth = 1920;
    public int ScreenHeight = 1080;

    private Vector2 PointerPos;
    private Vector2 LastPointerPos;

    private Material ScreenMaterial;


    public float PointerAltitude = 0.001f;

    void Start()
    {
        ScreenMaterial = capture.GetComponent<MeshRenderer>().sharedMaterial;
    }
	void Update ()
    {
        var lastPos = LastPointerPos;
        if (capture.isPointerVisible)
        {
            // DesktopPlaneの中心位置からのズレ分を計算
            // 10を掛けているのはPlaneの大きさのため
            PointerPos.x = (capture.pointerX / (float)ScreenWidth - 0.5f) * capture.transform.localScale.x * 10;
            PointerPos.y = (capture.pointerY / (float)ScreenHeight - 0.5f) * capture.transform.localScale.z * 10;
            LastPointerPos = new Vector2(capture.pointerX / (float)ScreenWidth, capture.pointerY / (float)ScreenHeight);
        }

        // スクリーン平面上の目(頭が向いている向き)の位置を計算する
        // http://t-pot.com/program/93_RayTraceTriangle/index.html を参照
        var t = -Vector3.Dot(Head.position -  capture.transform.position, capture.transform.up) / Vector3.Dot(Head.transform.forward, capture.transform.up);
        var eyePos = Head.transform.position + t * Head.transform.forward;

        // スクリーンのUV座標に変換する
        var offset = eyePos - capture.transform.position;
        var eyeUV = new Vector2(Vector3.Dot(-capture.transform.right, offset) / (10 * capture.transform.localScale.x),
                                Vector3.Dot(-capture.transform.forward, offset) / (10 * capture.transform.localScale.z));
        eyeUV += new Vector2(0.5f, 0.5f);


        ScreenMaterial.SetVector("_EyePos", eyeUV);
        ScreenMaterial.SetVector("_MousePos", LastPointerPos);
        ScreenMaterial.SetFloat("_ZoomRadius", ZoomRadius);
        ScreenMaterial.SetFloat("_Zoom", Zoom);
        ScreenMaterial.SetFloat("_Aspect", ScreenWidth / (float)ScreenHeight);


        // DesktopPlaneは回転するので、その方向に合わせてオフセットさせる
        // 更に自身の左上をポインタ地点に合わせるために、localScaleでずらしている
        // 5を掛けているのはPlaneの大きさのため
        transform.localPosition = capture.transform.position -
            capture.transform.right * (PointerPos.x + transform.localScale.x * 5) +
            capture.transform.up * PointerAltitude -
            capture.transform.forward * (PointerPos.y - transform.localScale.z * 5);


        if(Input.GetKeyUp(KeyCode.S))
        {
            Application.CaptureScreenshot("capture.png");
        }
	}
}
まとめ
今回はシェーダー等を利用して、テクスチャのミップマップ化と、仮想スクリーンの解像度が足りない場合の解決策を模索しました。現状プロがこれを常用するか?と言われれば、今は絶対あり得ない状態ではあります。ただ気分転換や遊びでたまーに使う、といったレベルには達したのではないかと思います。(少なくともUI操作などは可能になったので)
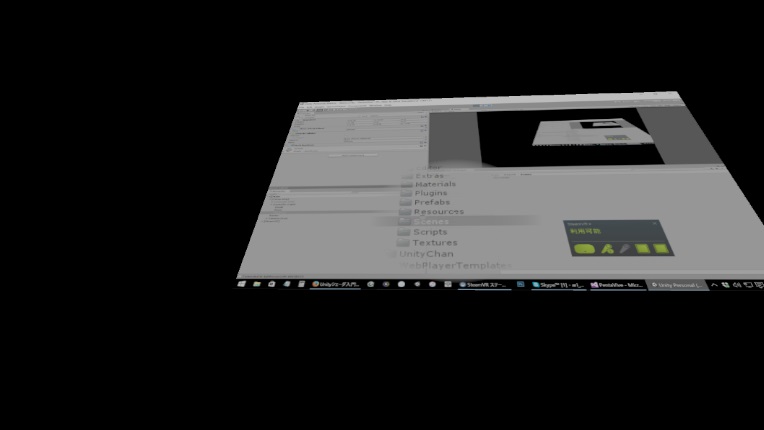
上記のキャプチャにもある通り、正面に大きなスクリーンを配置して、解像度が必要な場合そちらで操作する、というのも試しましたが、頭の移動量が多く疲れるのでイマイチでした。
しかしこの巨大スクリーンでムフフな動画(DMMなどDRMが掛かった動画は無理です)を見たりするとやはり迫力が違うので、通常のVirtualDesktop的用途なら十分アリですね。というか今回はお絵描き用というわけでも無く、汎用的な仮想ウィンドウ表示の仕組み、といった感じでしたね。
またアイデアとして、キャプチャしたテクスチャを別のテクスチャにコピーすることで、画面のスクリーンショットをとっておけるようになるはずです。
用途としては、『Googleなどで画像検索したものを表示している状態で、Viveコンなどを使って他の仮想ウィンドウにキャストすると、その仮想ウィンドウに割り当てられたテクスチャに現在の画面をコピーして、表示を固定できる』なんてのは結構アリかと思います。イメージはHololensです。(Hololensと違ってメイン画面以外は動きませんが)
あ、あと落ちまくるのはやっぱりマズイので、何とかしたいよなーとは思ってます。